Getting Four Boards the Same Thickness
I was standing over a slab of walnut last Tuesday, staring at a set of calipers that felt like they were lying to me. I had spent forty minutes trying to figure out how to thickness stock accurately for a simple tapered leg, only to realize I was fighting my own machine rather than working with it. Most people will tell you that thicknessing is just a matter of setting a fence and letting the motor do the heavy lifting, but that’s a lie that leads to bowed boards and wasted timber. The truth is, precision isn’t found in the settings of your planer; it’s found in the rhythm of your approach and knowing exactly when to stop before the wood fights back.
In this guide, I’m stripping away the technical jargon and the “perfect” studio setups you see in glossy magazines. I want to talk about the actual, gritty reality of managing grain direction, managing cutter head tension, and the small, tactical adjustments that keep your surfaces flat. You aren’t going to find any magic shortcuts here, just the honest, practical methods I’ve used over twenty years to ensure that when I finally pick up my joinery tools, the wood is actually behaving.
Guide Overview
Tools & Supplies
- Thickness Planer (for primary material removal)
- Jointer (to ensure one face is perfectly flat before planing)
- Digital Caliper (for precision measurement)
- Sandpaper (various grits for final smoothing)
- Rough Lumber (as needed)
- Marking Pencil (for noting thickness)
Step-by-Step Instructions
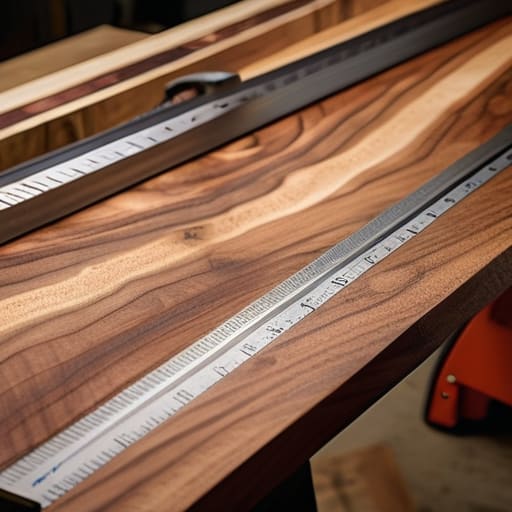
- 1. Before you even touch the machine, you have to stop trusting your eyes. I’ve spent decades watching people eyeball a board and assume it’s flat, only to find out halfway through a build that it’s bowed like a recurve bow. Take your calipers and your straightedge and actually do the work of checking the surface. You aren’t looking for perfection here; you’re looking for the truth of the wood.
- 2. Set your initial pass with a sense of extreme caution. If you’re working on a planer, don’t try to take off half an inch in one go just because you’re in a hurry to get to the glue-up. I usually set the depth to something conservative—maybe a sixteenth of an inch—because the goal isn’t speed, it’s predictability. You can always take more off later, but you can never put it back.
- 3. Once the machine is humming, feed the stock through at a steady, rhythmic pace. This is where the physical connection to the work happens. If you rush the feed, you risk creating those rhythmic “snipe” marks at the ends of the board that drive designers mad. Keep your movement consistent and deliberate, almost like a tempo in a piece of music.
- 4. After the first pass, stop the machine and get your tools back out. This is the part where most people skip ahead, but it’s the most vital step in the process. Re-measure the thickness at multiple points—the center, the edges, and the ends. You’re looking for the variance, not just the average, because that variance is what dictates how much work you have left to do.
- 5. Fine-tune your settings for the final “whisper” passes. When you get down to that last hair of material, you should be adjusting your machine in increments so small they feel almost negligible. I tend to treat these final passes with a certain reverence; this is where you transition from rough dimensioning to the actual surface texture that will eventually hold the finish.
- 6. Check for flatness one last time using a precision straightedge. Even if the thickness is exactly what you dialed in on your calipers, the board might have developed a slight twist or cup during the process. If it’s not true, you’ll need to go back and address the geometry of the piece before you ever dream of cutting joinery.
Understanding How to Thickness Stock Accurately
I’ve spent enough years in the shop to know that a machine is only as honest as the person tuning it. You can follow every step in a manual, but if you haven’t accounted for thickness planer calibration, you’re essentially just guessing with expensive timber. I remember a series of walnut slabs from a few years back where I pushed the feed rate too fast, thinking I was being efficient. Instead, I ended up with a rhythmic wave pattern that no amount of sanding could fix. It taught me that accuracy isn’t about speed; it’s about the predictability of the cut.
Before you even touch the power switch, you have to respect the relationship between the grain and the blade. If you’re working with figured wood, preventing tear-out during planing becomes an obsession rather than a suggestion. I’ve learned to slow down, perhaps even take a pass with a higher cutter head, because the cost of a mistake is always higher than the time spent being cautious. It’s that tension—the choice to take a hair more or a hair less—that determines whether the wood feels like a finished product or just a piece of lumber.
Key Things to Know
I’ve spent enough years in the studio to know that a machine is only as honest as its last setting. You can follow every step in the book, but if you haven’t prioritized thickness planer calibration, you’re essentially just gambling with your material. I remember a walnut slab from three years ago—it’s sitting in my “failure” bin because I assumed the machine was true. I ended up with a board that looked fine to the eye but was thinner at one end than the other, a mistake that cost me a week of work.
It’s also worth remembering that thicknessing isn’t a standalone act; it’s part of a larger conversation with the wood. If you aren’t using a jointer for stock preparation first, you’re asking for trouble. You cannot achieve a truly uniform board thickness if you’re trying to plane a surface that isn’t already flat. Trying to force a twist out with a planer is a recipe for disaster. I always tell my apprentices: respect the grain, check your flatness early, and never trust a measurement until you’ve verified it with more than just a glance.
Practical Tips and Steps
I’ve spent enough years in a studio to know that a machine is only as reliable as the person standing behind it. I once spent three days on a walnut sideboard only to realize the legs were off by a hair because I’d trusted a dull blade. If you want to avoid that kind of heartbreak, start with your thickness planer calibration. It’s tedious, and it’s the last thing you want to do on a Tuesday morning, but checking your settings before you touch the good timber is the difference between a clean run and a pile of expensive scrap.
When I’m working with particularly finicky figured grain, I’ve learned that preventing tear-out during planing is less about the machine and more about the approach. I usually take much lighter passes than the manual suggests. It’s tempting to try and hit your final dimension in one go, but that’s how you end up with a surface that looks like it was chewed by a dog. If the wood feels like it’s fighting the cutter head, back off. Slow down. The goal isn’t just to get to the number; it’s to respect the material along the way.
The Margin of Error
We spend so much time chasing the decimal point, treating thickness like a mathematical absolute, when the real skill lies in the tension of the final pass—knowing exactly when to stop before you turn a piece of beautiful timber into nothing more than expensive sawdust.
Jonathan Marin
The Margin of Error
At the end of the day, getting your stock to a uniform thickness isn’t just about chasing a number on a digital readout; it’s about managing the variables that want to ruin your afternoon. Whether you are sweating over the calibration of a planer or carefully checking your passes with a calipers in hand, the goal is to minimize the unpredictable movement of the grain. You have to respect the setup, double-check your fence, and, most importantly, listen to the machine. If you rush the process or ignore the subtle signs of tear-out, you aren’t just losing material—you are losing the structural integrity that a well-planned piece requires.
I still have a drawer in my studio filled with offcuts that were thicknessed just a hair too thin, a graveyard of “almosts” that taught me more than any perfect board ever could. We often treat precision as a chore, a technical hurdle to clear before the “real” design work begins, but the truth is that the precision is the work. It is the discipline of the constraint. When you finally hold a piece of timber that is perfectly true, you aren’t just holding wood; you are holding the result of a thousand small, correct decisions. That is where the craft actually lives.
