Winding Sticks and a Flat Face
I was staring at a slab of cherry last Tuesday, my shoulders aching and my patience thinner than a shaving, wondering why I didn’t just reach for the thickness planer. The myth we’re sold is that hand-tool work is some romantic, meditative pursuit, but the reality is often just a frustrating battle against physics. Most people think learning how to flatten a board by hand is about muscle or some mystical connection to the wood, but it’s actually about understanding the geometry of your own mistakes. I spent years trying to force the timber to obey through sheer willpower, only to realize that the wood doesn’t care about my ego; it only cares about the plane iron.
I’m not here to sell you on the “zen” of woodworking or give you a flowery lecture on craftsmanship. Instead, I want to walk you through the actual, unvarnished mechanics of the process—the way I do it in my own studio when the machines feel too blunt for the task. We’ll cover how to read the high spots, how to set your iron so it actually cuts rather than tears, and how to know when you’ve finally won. This is about the grit of the work, not the inspiration.
Guide Overview
Tools & Supplies
- Hand plane (Jack plane or smoothing plane for removing material)
- Marking gauge (To set depth and reference lines)
- Straight edge (To check flatness periodically)
- Sandpaper (Various grits for final smoothing)
- Wood board (The workpiece being flattened)
- Sawdust or shavings (To check for evenness)
Step-by-Step Instructions
- 1. Before you even touch a blade to the wood, you have to establish a baseline of truth. I’ve spent too many hours trying to plane a board that was already lying to me, so I start by laying a straightedge across the grain. If you don’t have a precision steel rule, any rigid, flat object will do. You’re looking for the high spots—those deceptive little ridges that pretend the board is flat when it’s actually rocking like a boat.
- 2. Once you know where the trouble lies, it’s time to set up your plane. I usually reach for my No. 5, but the key isn’t the tool itself; it’s the depth of the cut. I tend to go too aggressive when I’m frustrated, trying to force the wood to comply, but that’s how you end up with deep gouges that take three more hours to fix. Set the blade so it takes a shaving thin enough to see through, almost like a whisper of wood.
- 3. Now comes the physical rhythm of the work. You shouldn’t be hacking at the board; you should be gliding. I find that working from one end to the other, following the grain, prevents the blade from tearing. If you feel the resistance increase, you’re likely hitting a knot or a change in density, and that’s when you need to slow your breathing and let the tool do the heavy lifting rather than your shoulder.
- 4. As you work, you have to constantly check your progress. This is the part where most people get impatient and skip ahead, but I’ve learned that constant verification is the only way to avoid over-correcting. Every few passes, lay that straightedge back down. If you see light passing under the rule, you’ve found a valley; if the rule rocks, you’ve still got a hill to climb.
- 5. There will be a moment, usually about halfway through, where the board looks worse than when you started. It might look uneven, or the grain might seem to jump. This is the crucial threshold where I usually consider walking away to the letterpress or grabbing a coffee. Don’t. This is just the wood revealing its true character, and you have to stay the course to smooth it out.
- 6. Once the board is visually flat, the final stage is about refinement. I switch to a much shallower angle, almost shaving the surface of the air itself. The goal here isn’t to remove material, but to erase the evidence of the struggle. You want the surface to feel like silk, a result of hundreds of tiny, controlled decisions rather than one big, violent stroke.
- 7. Finally, clean the plane and the board. I always take a moment to look at the pile of shavings on the floor. They are the physical record of the decisions I made—the thick ones where I was being too bold, and the thin ones where I was being careful. To me, a truly flat board isn’t just a technical achievement; it’s a negotiation completed between the maker and the material.
Understanding How to Flatten a Board by Hand
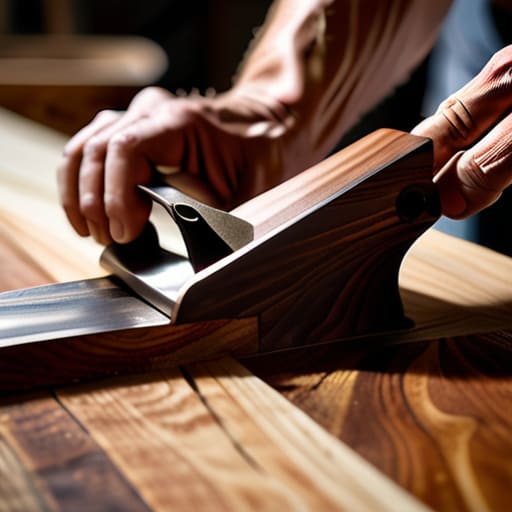
You have to understand that a board is never truly “still.” Even after it’s dried, the wood retains a kind of cellular memory, a tension that wants to pull it back into a curve. When I’m checking for cup and twist, I’m not just looking for a straight line; I’m looking for the wood’s intent. Most beginners treat a plane like a machine that forces compliance, but it’s more of a conversation. You have to listen to how the blade bites. If you push too hard against a high spot, you aren’t flattening the timber; you’re just fighting a war you’ll eventually lose.
I’ve spent many late nights in the studio staring at a piece of walnut that refused to cooperate, and I’ve learned that the secret lies in your hand plane setup for flattening. If your iron is set too deep, you’ll tear the fibers rather than shearing them, leaving you with a surface that looks flat but feels like a topographical map. I often start with a jack plane to take the heavy lifting out of the way, but the real work—the part that requires actual patience—happens when you transition to the jointer plane. It’s about finding that narrow window where the wood finally stops resisting and starts yielding.
Key Things to Know
Before you ever touch steel to wood, you have to respect the geometry of the problem. I’ve spent more afternoons than I care to admit staring at a piece of white oak that looked straight enough, only to realize it was fighting me in three different directions. You cannot simply start shaving; you have to spend time checking for cup and twist with a reliable straightedge and a light source. If you don’t understand the specific way the timber is warping, you’ll end up chasing your own tail, inadvertently creating a new high spot every time you think you’ve found a low one.
The tool choice is where the real tension lies. For the heavy lifting, I usually lean on a longer tool—using a jointer plane is almost non-negotiable if you want to bridge those long-distance dips. A shorter plane is a precision instrument, but on a bowed board, it’s too easy to accidentally follow the curve rather than correcting it. It’s a delicate dance of leverage and patience. I’ve learned that the goal isn’t just to remove material, but to negotiate with the wood until it finally agrees to be flat.
Practical Tips and Steps
I’ve spent more hours than I care to admit staring at a piece of timber that refused to behave. When you’re deep into the process, it’s easy to fall into the trap of mindless shaving, but you have to listen to the wood. I’ve found that the real secret isn’t in the strength of your stroke, but in your hand plane setup for flattening. If your blade is even slightly dull or the mouth is set too wide, you aren’t smoothing the surface; you’re just creating a different kind of chaos. I keep a small notebook of these failures—the ones where I pushed too hard and ended up with a gouge instead of a plane.
Before you even touch the iron to the grain, you need to be honest about what you’re fighting. Checking for cup and twist is the only way to avoid a frustrating cycle of corrections. I usually start by laying a straightedge across the length, looking for those subtle, deceptive shadows that tell you where the tension is hiding. If the board has a heavy twist, you might find yourself using a jointer plane to take the initial, aggressive bites. It’s a battle of patience, not speed.
The Resistance of the Material
We tend to think of flattening as a process of correction, but it’s actually a negotiation; you aren’t just removing high spots, you’re learning exactly where the wood intends to fight you and deciding, stroke by stroke, when to stop fighting back and start listening.
Jonathan Marin
The Residue of the Process
At the end of the day, flattening a board isn’t about the perfection of the plane or the sharpness of the iron; it’s about the negotiation between the tool and the wood. You’ve learned that success lies in the patience of the long stroke, the constant checking of the straightedge, and the willingness to listen to the sound the shaving makes as it curls away. It is easy to get frustrated when the high spots refuse to yield, but remember that every pass is an exercise in disciplined observation. If you find yourself fighting the grain, stop, reset, and look again. The goal isn’t just a flat surface, but a surface that has been earned through a series of intentional, corrective movements.
I have a shelf in my studio filled with these “failures”—boards that were too twisted or too stubborn to ever reach my final assembly. Looking at them now, I realize they taught me more about the nature of timber than the pieces that went smoothly into production. There is a certain quiet dignity in the struggle of manual labor. When you finally lay that board on a granite slab and hear that singular, clean clack of a true flat surface, you aren’t just celebrating a technical victory. You are celebrating the fact that you stayed in the chair long enough to make the right decision when the easy one would have been to walk away.
