Laminating Instead of Steaming
I was staring at a pile of splintered walnut veneers and a ruined glue-up, wondering why I ever thought I could master the bend. Most textbooks will tell you that success is all about the precision of your clamps or the exact viscosity of your adhesive, but they’re selling you a sanitized version of the craft. The truth is, knowing how to laminate a curve isn’t about following a perfect recipe; it’s about understanding the unpredictable tension that lives inside the wood itself. I’ve spent twenty years making mistakes—most of which are currently sitting in a bin in my studio, labeled with the specific way they failed—and if there is one thing I’ve learned, it’s that the wood will always try to go its own way if you aren’t paying attention.
In this guide, I’m stripping away the theoretical nonsense to give you the actual, gritty mechanics of the process. We aren’t going to talk about “ideal conditions,” because those don’t exist in a real workshop. Instead, I’ll walk you through the specific bracing techniques and moisture management tricks that actually prevent a catastrophic split. You’ll get a honest look at the workflow required to ensure your laminations hold their shape without fighting the grain every step of the way.
Guide Overview
Tools & Supplies
- Heat gun or hair dryer for softening material
- Rolling pin or heavy cylinder for smoothing
- Jigsaw or coping saw for cutting curves
- Plywood or MDF strips (length depends on project)
- Wood glue or specialized laminating adhesive (1 bottle)
- Clamps (multiple, varying sizes)
- Sandpaper (various grits)
Step-by-Step Instructions
- 1. I usually start by selecting my veneers, but the real work begins with the glue. You can’t just slap any PVA on there; you need something with enough open time to let you manipulate the wood before it grabs. I tend to thin my adhesive just a hair—not enough to make it run like water, but enough to ensure it penetrates the grain rather than just sitting on top like a film.
- 2. Once the glue is laid, you have to prepare your form. I have a collection of plywood jigs that have seen better days, but they work. The trick is to apply a thin layer of release agent—wax or even just a bit of soapy water—to the mold. If you skip this, you aren’t just making a mistake; you’re essentially welding your hard work to your workbench.
- 3. Laying the veneers is where the tension starts to build. I find it best to work from the center of the curve outward. You want to avoid any air pockets that look like uninvited guests trapped under the surface. I use a soft rubber roller to press the wood down as I go, feeling for those tiny, hollow clicks that tell you a bubble is lurking somewhere.
- 4. This is the part that makes my heart rate spike: the clamping. You can’t just throw a few C-clamps at a curve and hope for the best. You need to use cauls—stiff, sacrificial pieces of wood that distribute the pressure evenly across the arc. If you don’t, the pressure will concentrate on a single point, and you’ll end up with a beautiful, expensive piece of scrap that looks like a crushed soda can.
- 5. I always tighten the clamps in a sequence, moving in a slow, rhythmic circle around the piece. It’s a bit like a ritual. I watch the edges of the veneer closely; if I see the glue starting to weep out from the sides, I know the pressure is right. If nothing comes out, you haven’t clamped hard enough, and you’ll be dealing with delamination for the next six months.
- 6. Patience is the most underrated tool in the shop. Once the clamps are set, you have to leave it alone. I’ve been tempted to “just check” the bond a dozen times, but every time you loosen a clamp to peek, you risk shifting the geometry. Let it sit for at least twelve hours—ideally twenty-four—in a space where the humidity isn’t swinging wildly.
- 7. Finally, once the glue has cured, you carefully remove the piece from the form. This is the moment of truth. I take a sharp scraper to the edges to clean up any squeeze-out, working with the grain, never against it. It’s a quiet, meditative way to finish, acknowledging that the struggle with the curve is finally, mercifully, over.
Understanding How to Laminate a Curve
When you’re staring at a stack of thin veneers, it’s easy to treat the process like a mere mechanical procedure. But there is a psychological weight to it. I remember a chair leg I worked on years ago—a piece that ended up in my “reject” pile because I underestimated the springback. I thought I had the tension right, but I hadn’t accounted for how the fibers would fight back once the clamps were released. The trick isn’t just about the sequence; it’s about understanding the structural integrity of curved laminates before you even spread the first drop of adhesive. You aren’t just gluing wood; you are negotiating with its memory.
I’ve learned that the most successful bentwood lamination process relies less on brute force and more on a rhythmic patience. If you rush the glue application or fail to ensure even contact while laminating around a form, you’re essentially setting a trap for yourself. The glue line becomes a point of failure rather than a bond. I tend to over-apply slightly, even if it feels messy, because a dry spot in a tight radius is a mistake you can’t undo once the pressure is set.
Key Things to Know
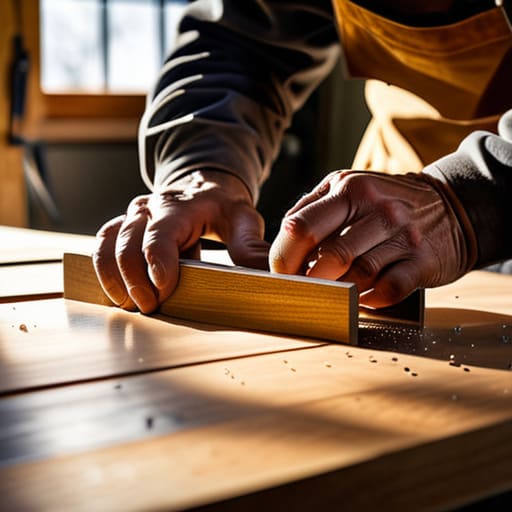
One thing I’ve learned from two decades of watching grain fight against my intentions is that you cannot treat the glue as a mere adhesive; it is a structural component. When you are shaping wood with glue and pressure, the moisture content in those thin veneers becomes your most volatile variable. If your shop is too dry, the wood will fight the form; if it’s too damp, the layers might slide during the cure. I once lost a week’s worth of work because I rushed the clamping sequence, failing to realize that the internal tension was building faster than the bond could set.
It also helps to respect the limits of your material. There is a fine line between a graceful arc and a catastrophic failure of the structural integrity of curved laminates. I keep a drawer full of split veneers—reminders of the times I pushed a radius too tight without increasing the number of layers. Sometimes, the most professional decision isn’t finding a way to force the wood to bend, but rather deciding to add one more ply to distribute that stress more evenly.
Practical Tips and Steps
I have a drawer in my studio filled with offcuts from failed attempts, and most of them share a common theme: impatience. When you are working with the bentwood lamination process, the temptation to rush the clamping sequence is immense. I’ve learned the hard way that if you don’t apply pressure incrementally, you’ll end up with internal voids that compromise the entire piece. I used to think more clamps meant more security, but I’ve realized it’s actually about the rhythm of the squeeze. You need to move around the form methodically, ensuring the glue line is consistently compressed without crushing the fibers.
Another thing I’ve come to respect is the relationship between moisture and tension. When you are shaping wood with glue and pressure, the wood is essentially fighting you. I often find myself pausing to check the grain direction against the radius of the bend; if the tension feels “angry,” I back off. It’s not about following a manual; it’s about listening to how the material reacts to the constraints you’re imposing on it. Sometimes, the most important step is simply waiting an extra hour before you even think about removing the form.
The Tension of the Grain
I spent three days fighting a single radius that refused to hold, only to realize that the error wasn’t in my clamping pressure, but in my refusal to respect the wood’s inherent resistance. Lamination isn’t about forcing a shape; it’s about negotiating a compromise between the geometry you want and the physics that actually exists.
Jonathan Marin
The Ghost in the Grain
At the end of the day, successful lamination isn’t just about the glue or the pressure of the clamps; it’s about respecting the tension inherent in the wood itself. You have to manage the moisture, select your grain direction with a bit of foresight, and most importantly, listen to the material as it begins to take shape. I’ve spent too many afternoons staring at a split veneer because I thought I could force a radius that the wood simply wasn’t ready to inhabit. It comes down to the preparation—the incremental steps of sanding, the careful application of adhesive, and that final, nervous moment when you release the clamps to see if the curve holds its integrity or fights back.
Looking at the finished piece sitting on my workbench, I don’t just see a successful curve; I see the mistakes I narrowly avoided. My studio is full of those “almost” failures, and honestly, they are my best teachers. Don’t aim for a sterile, perfect execution that looks like it came off a CNC router. Instead, aim for a piece where the craftsmanship is visible in the deliberate choices you made when things got difficult. The beauty isn’t in the absence of struggle, but in the way you navigated the constraints to find something worth keeping.
