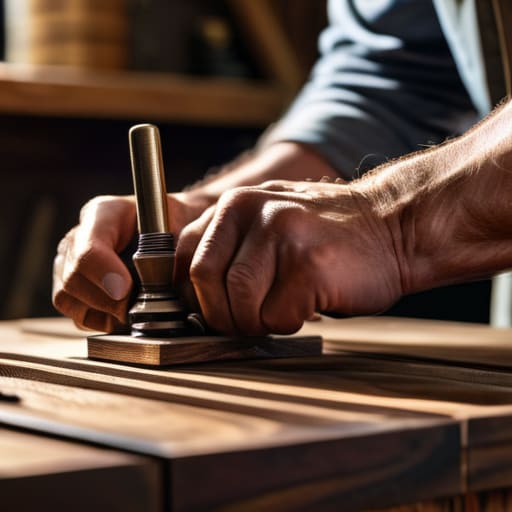
Fitting Hardware to a Finished Piece
I was staring at a half-finished walnut sideboard last Tuesday, a drill bit trembling in my hand, wondering if I had finally overstepped. For years, the textbooks and the senior designers told me that hardware was the first thing you plan for—the anchor that dictates the entire geometry of the piece. But after twenty years of seeing how wood moves and how production lines actually behave, I’ve learned that the most honest way to work is to wait. People often ask me how I fit hardware at the end of a build, and they usually assume it’s a sign of poor planning or a lack of foresight. In reality, it’s a deliberate choice to let the object speak for itself before I force a handle or a hinge onto its face.
In this guide, I’m going to pull back the curtain on this specific, somewhat controversial workflow. I won’t give you any glossy, idealized version of workshop management; instead, I’ll share the messy, practical logic of why I wait until the very last moment to commit to the metal. You’ll learn the exact sequence I use to ensure precision, how to manage the inherent risks of late-stage assembly, and how to turn what looks like an afterthought into the most intentional moment of your entire process.
Guide Overview
Tools & Supplies
- Screwdriver (Manual or electric for driving screws)
- Measuring tape (To ensure alignment and spacing)
- Pencil (For marking drill points or screw locations)
- Level (To ensure hardware is straight)
- Hardware kit (Handles, knobs, or pulls)
- Screws (Included with hardware or specific length needed)
- Sandpaper (To smooth any pre-drilled holes)
Step-by-Step Instructions
- 1. I start by laying out every single piece of hardware on a clean sheet of shop paper. It sounds tedious, but I need to see the physical weight of the metal against the wood before a single hole is drilled. If the brass pulls too much visual attention away from the grain, I know I’ve already lost the battle.
- 2. Next, I use a piece of blue painter’s tape to map out the placement. I don’t trust my eyes alone; I need to see the shadows the hardware casts against the surface. This is where I usually have my first crisis of confidence, questioning if a pull is too large or if the offset is just slightly off-center.
- 3. Once the tape is set, I mark the center points with a very sharp, thin pencil—never a thick carpenter’s pencil. Precision at this stage is the only thing standing between a professional finish and something that looks like a clumsy afterthought. I treat these marks with more respect than the actual joinery.
- 4. I drill my pilot holes using a drill press rather than a hand drill whenever possible. The goal is a perfectly perpendicular entry; even a half-degree of tilt will make the screw sit crooked, and in my world, a crooked screw is a permanent scar on the design.
- 5. Before the actual installation, I hand-thread the screws into the pilot holes just a few turns. This allows me to check the alignment one last time without the commitment of a full tighten. It’s my safety net, a way to ensure the hardware isn’t fighting the wood.
- 6. Finally, I drive the hardware home, but I do it slowly. I’m listening for the way the metal settles into the timber. I’ve learned that the most satisfying moment isn’t the completion, but that final, firm turn where the hardware and the object finally become one.
Understanding How I Fit Hardware at the End
There is a certain anxiety that sets in when you reach this stage. After weeks of sawdust and structural decisions, the hardware feels like the final verdict on whether the piece actually works or if it’s just a beautiful sculpture. I’ve learned that you cannot rush this; if you treat it as a mere checkbox, you’ll miss the subtle friction between the metal and the wood. I often find myself obsessing over precision fitting techniques, checking the pull of a drawer or the swing of a door against the grain, ensuring that the weight of the piece is balanced by the strength of the attachment.
It isn’t just about the aesthetics, though. It’s about the physics of longevity. I treat the final stage as a form of hardware assembly troubleshooting before the piece even leaves my shop. I’m looking for the slightest wobble or a screw that bites too deep into a soft grain. If I don’t get the proper tool alignment right now, I’m essentially building a failure into the object. A well-fitted handle isn’t just a way to open a cabinet; it’s the tactile handshake between the user and the maker.
Key Things to Know
One thing my years in the studio have taught me is that hardware isn’t just an additive; it’s a corrective measure. When you’re working through the final stages, you have to account for the fact that wood moves and even the best-measured joints can have a slight, almost imperceptible drift. This is why I prioritize precision fitting techniques over simply following a blueprint. If you rush the placement because you think the carcass is perfectly square, you’ll find yourself fighting the screws ten minutes later. I’ve spent far too many afternoons staring at a drawer pull that sits a millimeter too high, a mistake born from assuming the work was done before the metal touched the wood.
It also helps to view the process through the lens of hardware assembly troubleshooting before you even pick up a driver. I always keep a small pile of “failed” attempts nearby—the ones where I over-tightened a brass screw or stripped a pilot hole. It reminds me that proper tool alignment is more about the tension in your hand than the quality of the screwdriver. If you feel resistance, stop. Don’t force the marriage between metal and timber; let the hardware find its seat.
Practical Tips and Steps
One thing I’ve learned from years of staring at failed joints is that you can’t rush the final marriage of metal and wood. I often find myself hovering over a piece, second-guessing the placement, but I’ve realized that precision fitting techniques aren’t just about the drill bit; they are about the patience to check your work three times before the screw ever touches the grain. If you feel a sense of urgency to just “get it done,” stop. That’s usually when a slip happens that ruins a week of sanding.
I also make it a rule to keep a dedicated tray for my fasteners, organized by length and thread. It sounds tedious, but it prevents the nightmare of hardware assembly troubleshooting when you realize you’ve driven a screw too deep into a finished surface. When you are finally securing hardware components, treat the tool like an extension of your hand. A slight tilt in your wrist during the final tightening can be the difference between a seamless connection and a stripped hole that haunts you every time you open a drawer.
The Tension of the Final Detail
I’ve learned that hardware shouldn’t be an afterthought, but it often works best as a final negotiation between the wood and the hand. There is a specific kind of tension in waiting until the very end to commit to a screw or a pull; it’s the moment where you stop designing the object and finally start listening to it.
Jonathan Marin
The Weight of the Final Choice
Looking back at the process, it really comes down to respect for the sequence. By holding off on the hardware until the very end, I’ve learned to prioritize the integrity of the joinery and the overall silhouette before letting the small details dictate the flow. It’s about managing that tension between the structural necessity of the screws and the aesthetic grace of the surface. We’ve covered the importance of precise marking, the patience required for the final assembly, and why rushing this stage is the quickest way to ruin a perfectly good piece of timber. Ultimately, it is a lesson in controlled restraint—knowing when to stop building and when to start refining.
My workshop is currently cluttered with a dozen rejected drawer pulls and misaligned mounting plates, each one a testament to a moment where I moved too fast. But that’s the reality of this work; it isn’t found in the seamlessness of a catalog, but in the friction of the decision-making process. I’ve realized that the most satisfying part of the build isn’t just seeing the piece stand complete, but knowing exactly which near-misses I avoided by waiting. Don’t be afraid to let the hardware be the final word. Sometimes, the best way to honor your craft is to wait for the right moment to let it speak.
