The Dry Fit Before Any Glue
I was standing in the middle of my studio last Tuesday, staring at a pile of walnut components that looked, on paper, absolutely perfect, yet felt fundamentally wrong. It’s that sickening moment when you realize that even the most precise joinery can’t fix a structural misunderstanding. Most people think dry fitting is just a quick check for tight tolerances, but that’s a lie we tell ourselves to save time. To me, learning how I dry fit a whole piece isn’t about verifying measurements; it’s about the confrontation with the design before the glue makes your mistakes permanent. I have a shelf in the corner of my shop filled with prototypes that failed this exact stage, and honestly, those failures taught me more than any successful build ever could.
In this guide, I’m stripping away the polished, step-by-step perfection you see in glossy magazines to show you the messy reality of the process. I’ll walk you through my personal ritual for assembly testing, from managing heavy carcasses to the subtle art of checking for squareness under pressure. You won’t find any shortcuts here—just the honest, practical methods I use to ensure that when the glue finally hits the wood, I’m not just hoping for the best, but expecting it to work.
Guide Overview
Tools & Supplies
- Clamps (Various sizes for holding components in place)
- Measuring Tape (To verify dimensions against plans)
- Caulk or Painter's Tape (To mark assembly points or prevent slips)
- Level (To ensure the assembly is square and flat)
- Project Components (The full set of cut pieces)
- Assembly Jig or Workbench (A flat, stable surface)
Step-by-Step Instructions
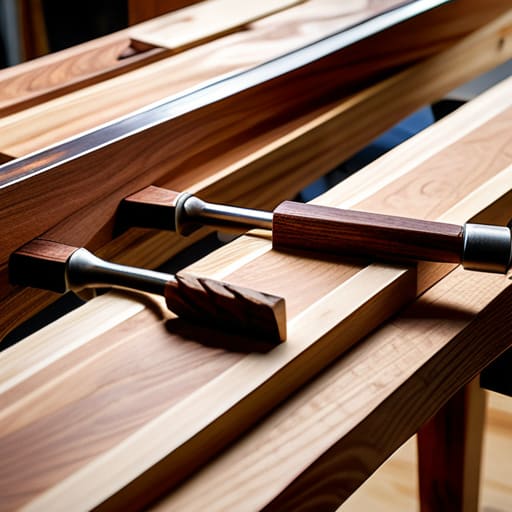
- 1. I always start by laying everything out on a clean, flat surface—ideally a workbench that isn’t cluttered with the debris of the previous project. I don’t just throw the parts together; I arrange them in a way that allows me to see the intended silhouette before a single drop of glue is even considered. It’s about seeing the ghost of the piece before it actually exists.
- 2. Once the parts are laid out, I begin the actual assembly, but I do it with a sense of extreme hesitation. I fit the joinery together, checking for squareness and gaps, but I make sure I never apply any pressure that might actually mar the wood. I’m looking for those tiny, annoying discrepancies in the tenons or the slight bow in a rail that you only notice when the whole structure is staring back at you.
- 3. This is where I check the geometry, specifically the diagonals. I take my framing square or a tape measure and ensure that the carcass is actually sitting true. It’s incredibly easy to get caught up in the beauty of a single joint and completely miss the fact that the entire frame is leaning two degrees to the left. If it isn’t square now, it never will be.
- 4. I move on to the “stress test,” which is essentially me poking and prodding the assembly to see where it feels flimsy. I want to see if the piece has any structural integrity or if it feels like a house of cards. I’m looking for the moment of instability—that slight wobble that tells me a shoulder is too thin or a mortise was cut a hair too wide.
- 5. Next, I do a thorough visual sweep of every single seam. I’ll often use a flashlight at a low angle to cast shadows across the joints; if there’s a gap, the light will find it immediately. I’m looking for the kind of imperfections that a client might not see, but that I will know are there every time I walk past the piece in my studio.
- 6. Finally, I take a moment to step back—literally. I walk to the other side of the room, sometimes even out of the shop for a minute, to let my eyes reset. I need to see the piece as a whole object, not just a collection of successful joinery. If the proportions feel off or the weight feels lopsided, I know I have to go back to the drawing board before the glue makes my mistakes permanent.
Understanding How I Dry Fit a Whole Piece
I’ve learned through years of seeing beautiful designs fail at the assembly stage that a dry fit isn’t just a technical checklist; it’s a conversation with the wood. When I’m checking tolerances in woodworking, I’m not just looking for gaps. I’m looking for the tension. I want to feel where the grain might fight the joinery once the glue starts to pull everything tight. It’s easy to get complacent when a joint slides in easily, but I’ve learned to be wary of a fit that feels too effortless. Often, that’s a sign that I’ve left myself no room for the inevitable slight expansion or the tiny imperfections that no machine can perfectly iron out.
I also try to view the pre-glue fitment testing as a way to de-risk the final hour of the build. There is a specific kind of panic that sets in when you realize a drawer box is a fraction of a degree out of square only after the glue has already begun to set. To avoid that, I treat the entire assembly as a single, living organism. I’m not just checking if parts A and B meet; I’m ensuring the structural alignment of the entire silhouette. If the piece feels “off” in my hands during the dry run, it will look “off” in a client’s dining room.
Key Things to Know
One thing I’ve learned after two decades of moving between custom studio work and high-volume production is that a dry fit isn’t just a rehearsal; it’s a diagnostic tool. I used to rush this stage, thinking I could solve problems with a bit of extra glue or a heavy mallet once the real assembly began. I was wrong. When you’re checking tolerances in woodworking, you aren’t just looking for a snug fit; you are looking for the subtle tells of a piece that wants to twist or bow under its own weight. If a joint feels “mostly okay” during the pre-glue fitment testing, it’s probably going to be a nightmare once the adhesive starts pulling the fibers.
I also find it helpful to approach the process with a sense of skepticism. I treat the entire assembly like a puzzle that might have a faulty piece. When I’m ensuring structural alignment on a larger sideboard or a heavy table, I look specifically for the gaps that appear only when the last component is seated. It’s in those tiny, unexpected spaces that the real design decisions happen—the moment you realize a tenon is a hair too proud or a shoulder is slightly out of square.
Practical Tips and Steps
One thing I’ve learned from two decades of watching joints fail under pressure is that you can’t just tap things together and hope for the best. I used to rush this, thinking I was saving time, but now I treat the dry fit assembly process as the actual moment of truth. I always keep a dedicated set of calipers and a marking knife nearby. If a tenon feels even slightly “proud,” I don’t force it. I’d rather spend twenty minutes adjusting joints before adhesive hits the wood than spend twenty hours sanding down a misaligned carcass after the glue has already set.
When I’m working on something substantial, like a dining table, I find that dry fitting large scale components requires a bit of spatial strategy. You can’t just pile them in a corner; you need to see the silhouette. I often clear my entire workbench just to ensure I have enough room to check for squareness without tripping over a stray leg or a tabletop. It’s about seeing the ghost of the finished piece before it becomes permanent. If it doesn’t sit perfectly now, it never will.
## The Ghost in the Joinery
A dry fit isn’t just about checking if the parts go together; it’s about confronting the version of the piece that failed. It’s that uncomfortable moment where you realize the geometry you planned on paper is fighting the reality of the wood, forcing you to make the hard choice between a beautiful mistake and a functional truth.
Jonathan Marin
The Final Alignment
At the end of the day, dry fitting isn’t just a technical checkbox or a way to avoid sanding a joint twice; it is a moment of absolute truth. It’s where the theoretical math of my drawings meets the stubborn, physical reality of the wood. By taking the time to assemble the entire piece—checking the squareness of the carcass, the tension in the joinery, and the way the light hits the grain before a single drop of glue is applied—I am essentially auditing my own mistakes. It is better to find a misalignment in the quiet of a dry fit than to realize you’ve ruined a week’s worth of work during the irreversible chaos of final assembly.
I often look at the scrap pile in the corner of my studio, a graveyard of “almosts,” and I realize that the best pieces aren’t the ones that went perfectly according to plan. They are the ones where the dry fit forced a pivot, a slight adjustment to a tenon, or a change in how a leg meets a rail. We often mistake design for a straight line from concept to completion, but the real craft happens in those hesitations. Don’t rush the assembly. Give yourself the permission to doubt the work while it’s still reversible, because that is exactly where the integrity of the object is actually born.
